How to Enable Server Backups in WHMCS
1. Configure Global Settings
Log in to WHM using your server’s root credentials, and select Backup Configuration under the Backup section in WHM’s main menu. You can begin typing backup into the search menu to narrow the list of menu options.

In the Global Settings section, select the radio button next to Enable to turn on the backup system. Note: The Enable button only turns on the backup system; you still need to instruct cPanel to back up accounts, and which accounts to back up. Now choose the type of backups you want cPanel to create:
Compressed - Compressed backups use the least amount of disk space, potentially giving you more restore points than could get with the other methods. Compressed backups take longer to complete, and the process of restoring an individual file requires the extra step of first extracting the file. In many cases, this type of backup represents the ideal option. As a side note, the size of a compressed cPanel backup will range from about 25% to 75% of the actual account size. This can also depend on several factors, such as the types of files owned by the account. Until the backups have completed, and you can see the actual size of each archive, it’s generally safe to estimate that a compressed backup will take up about half the space of the account itself. Once the backups have run, you can use the actual values to determine how many compressed backups to retain.
Uncompressed - Uncompressed backups complete faster, and the restore process is quicker because these backups do not need to be extracted from the archive. However, they take up the same amount of space as the account itself and as such, allow for fewer restore points. If you choose to use uncompressed backups, you must ensure that your retention policy does not allow you to run out of disk space.
Incremental - Incremental backups allow you to retain only one daily, one weekly, and one monthly backup. This provides fewer restore points than either of the other options. Because the backups are uncompressed, each will take up the same amount of disk space as the full account itself. This being said, individual files can be restored quickly but, changes to your data are synced each time backups run. This means that a corrupted, compromised, or modified file you want to restore could have been synced to your backup if the change was not noticed immediately.
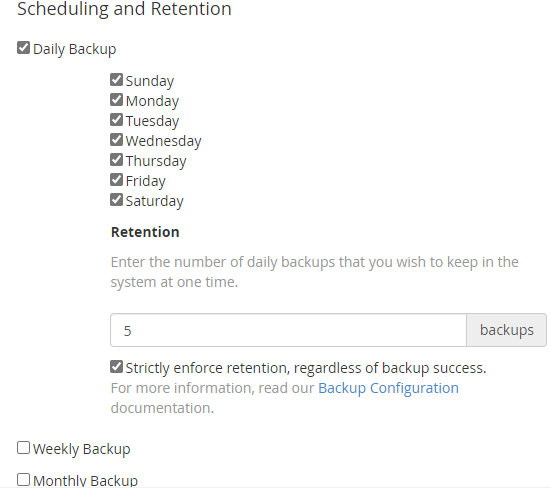
2. Choosing the Scheduling and Retention Options
The Scheduling and Retention section allows you to enable or disable daily, weekly, and monthly backups, and specify the number of each type of backup you wish to store. For daily and weekly backups, you can select the days of the week on which backups will be taken. For monthly backups, you can choose whether you want them to be taken at the beginning, the middle of the month, or both.
3. Select Account Backup Options
The Files section allows you to select which accounts to back up and choose more detailed options for each:
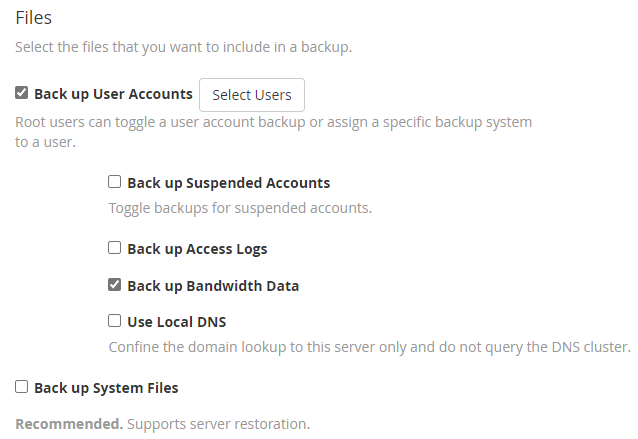
- We enabled the backup system itself in Global Settings above, and next, we’ll instruct cPanel to back up user accounts by checking the box next to Backup Accounts.
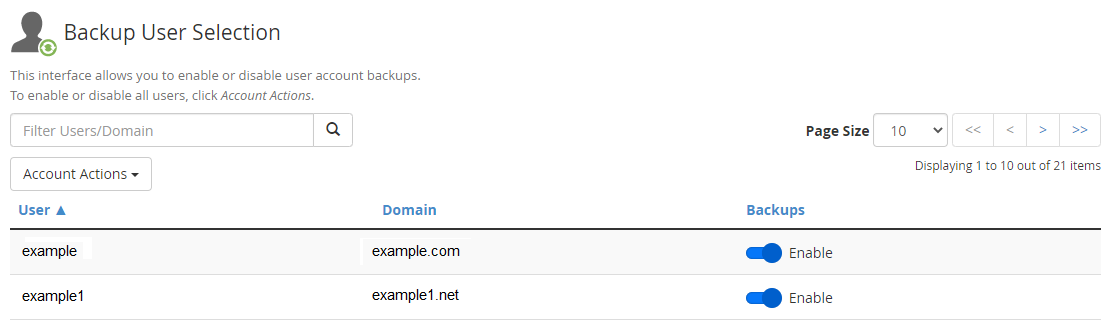
- Click the Select Users to open a new browser window (or tab, depending on your browser settings) where you can select the specific cPanel accounts to back up. Next, click the ON button in the Backups column for each domain you want to back up. Note that you can access this page directly at any time by clicking Backup User Selection in WHM’s main menu.
- Now we choose whether you want to back up accounts that are suspended, as well as access logs and bandwidth data for the accounts. Also, you can select whether you wish to back up system files and/or the individual accounts (which is necessary only for server restoration. The individual account can be restored regardless of your choice here).
4. Select Database Backup Options
In the Databases section, select whether you want to back up databases per account, the entire MySQL directory, or both. In most cases, you’ll want to choose Per Account and Entire MySQL Directory.

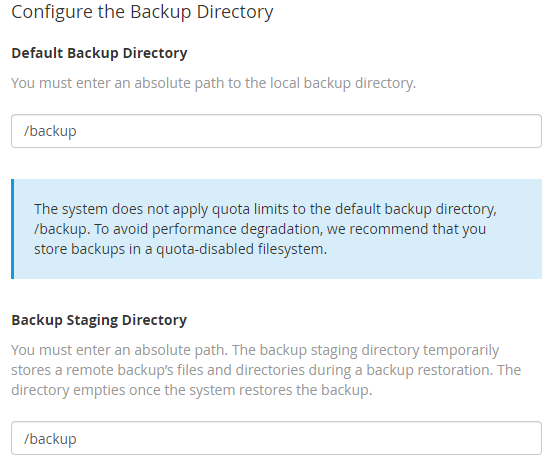
5. Select Backup Location
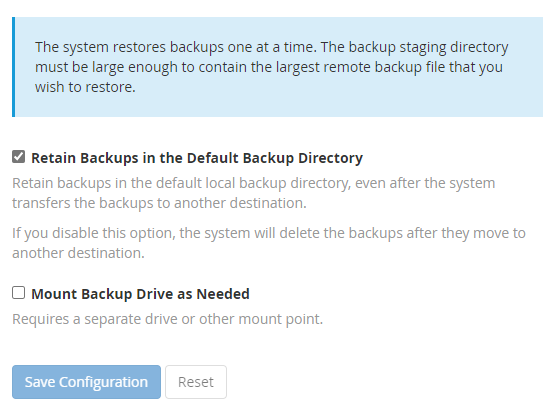
The Configure Backup Directory section allows you to choose whether you want to back up locally or externally.
- The Default Backup Directory is pre-configured, and in most cases should not be changed.
- If you elect to “Retain backups in the default backup directory”, local backups will be retained even if you configure the server to transfer them to an external destination automatically.
- The “Mount Backup Drive as Needed” option should, in most cases, remain disabled, as an external drive set up will be configured to mount at boot.
6. Review and Save Backup
Once you’re satisfied with your backup configuration, click the Save Configuration button to apply your settings.
