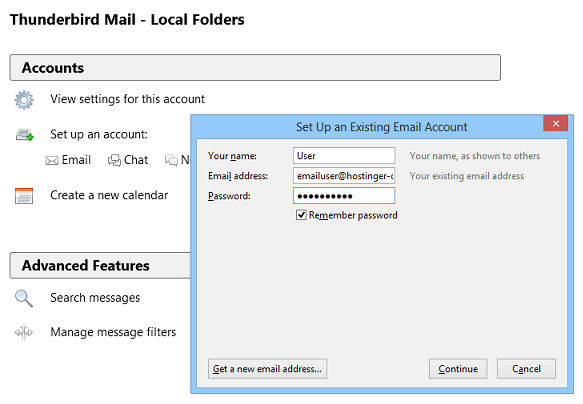
1. Open the Thunderbird client by double clicking the icon in your desktop and make sure the menu bar is enabled. If not, right click on a blank area at the top of the thunderbird application then put a check mark on the menu bar. Then click Tools > Account Settings > Account Actions. Under Account Actions click Add Mail Account and fill up the following fields:
- Your name: Name that will be used to describe yourself
- Email address: Account you use on your email
- Password: Password you use for your email account
- Remember Password: make sure the remember password has check.

2. Manual Configuration
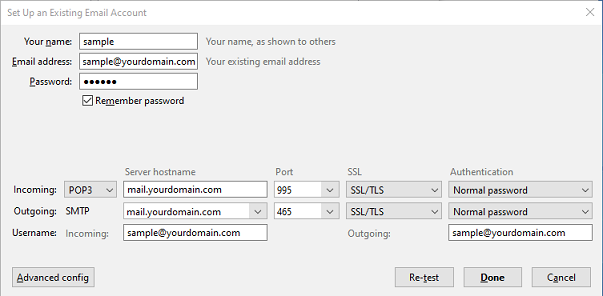
After you fill up the necessary fields click manual config and change the following fields.
- Incoming – iMAP change to POP3
- Server hostname: mail.yourdomain.com
- POP3 Port – auto change to 995
- SSL – autodetect change to SSL/TLS
- Authentication – change to Normal
- Outgoing SMTP
- Server hostname: mail.yourdomain.com
- POP3 Port – auto change to 465
- SSL – autodetect change to SSL/TLS
- Authentication – change to Normal
Username Incoming and Outgoing – account you use on your email
Click Re-test to check if there are corrections. If none, click Done.

3. You are now ready to use your email account using Thunderbird.

