This Article will guide you on How to Setup Outlook 365 Manually.
- Open control panel then click category and choose small icons.
- Select Mail.
- A new window will appear on the screen, click add to add a profile.
- Now, in the opened window, select Manual setup and click next.
- Select POP and click next.
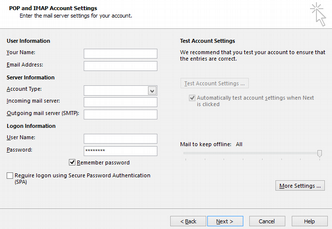
- Fill the required fields and go to More Settings to add the server details manually and click next.

User Information
Your Name: example
Email Address: [email protected]Service Information
Account Type: POP
Incoming mail server: mail.yourdomainname.com
Outgoing mail server: mail.yourdomainname.comLogon Information
User Name: your email address
Password: ******** - Click Remember password.
- Next click More Settings.
- Click the tab for Outgoing Server and make sure the box for “My outgoing server (SMTP) requires authentication” is checked.
- “Use same settings as my incoming mail server” needs to be selected.
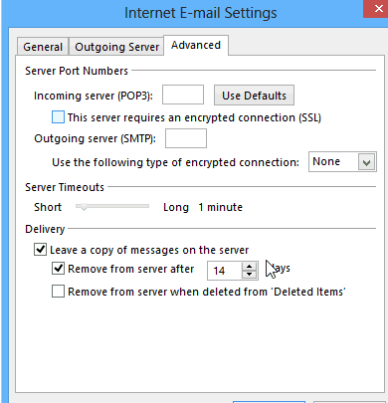
- Click the Advanced tab.
- Check if you are using the correct ports and encryption. The default settings are:
- Incoming server (POP) – port 995 – encryption SSL/TLS
- Outgoing server (SMTP) – port 465 – encryption SSL/TLS
- Check if you have entered INBOX as the Root folder path.
- Click OK then click Next.
- Outlook will now test the account settings. Click close when they are completed.
- Click Finish to complete the setup.
- Go to File and click Account Settings image then click Account Settings at the dropdown list
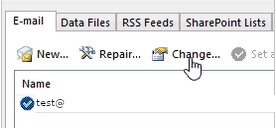
- Select your email account and click Change

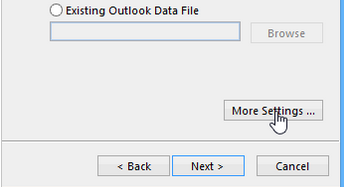
- Click More Settings

- Add check marks to "Leave a copy of messages on the server" and "Remove from server after" and Enter the desired number of days before the email gets deleted from the server then click Ok

Note: This setup only works on POP settings and deleted emails are non-retrievable. Please exercise with caution.

