This article will guide you on how to Backup your emails in cPanel.
This guide is best used when rebuilding your emails. We at CID SYSTEMS INC. recommends rebuilding your email accounts if all your emails are infected with virus, spam, and phishing. This procedure backs up non-empty email folders but not the email addresses itself.
Backup Procedure
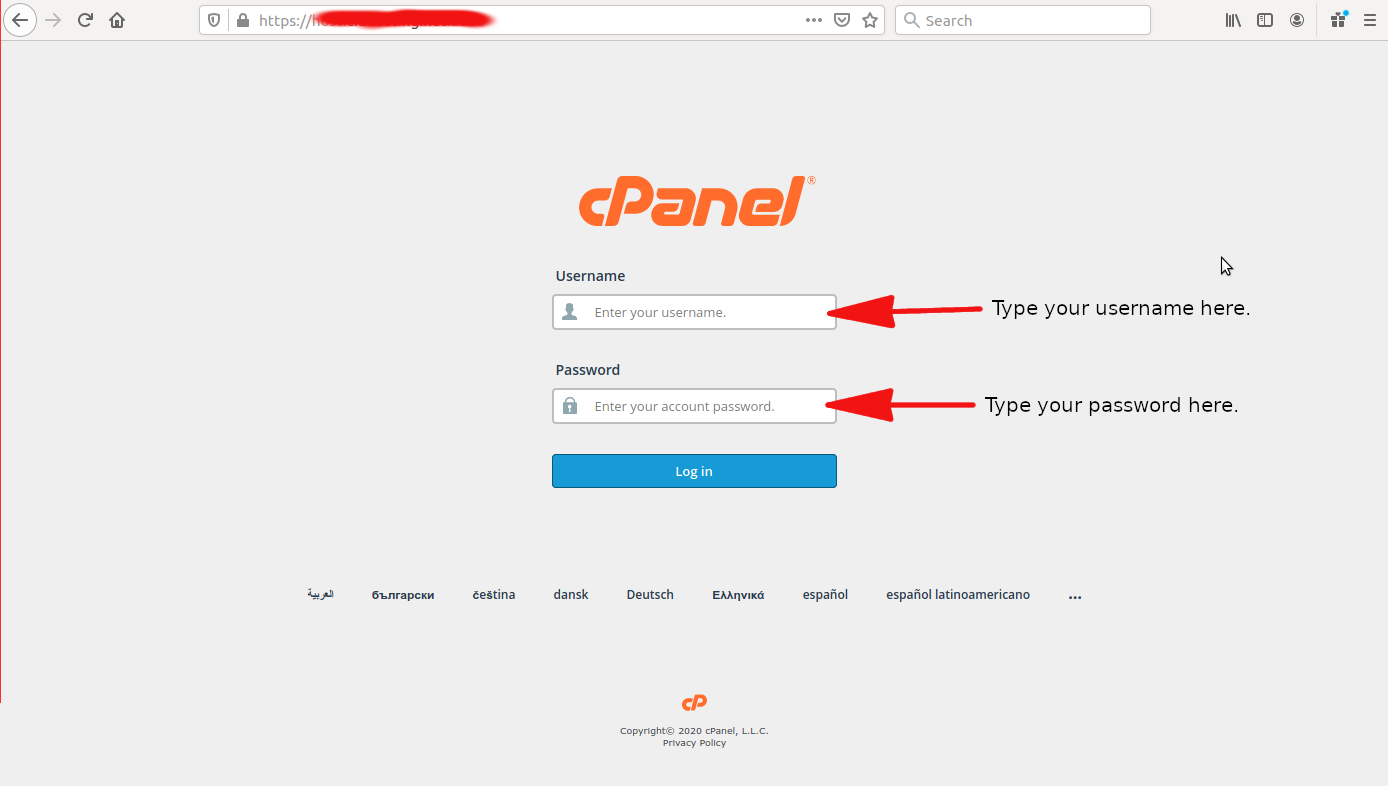
1. Login to your cPanel.
-
Go to your cPanel by typing https://www.yourdomain.com/cPanel
-
Username: account you use to login to your cPanel.
-
Passoword: Password for your cPanel account.
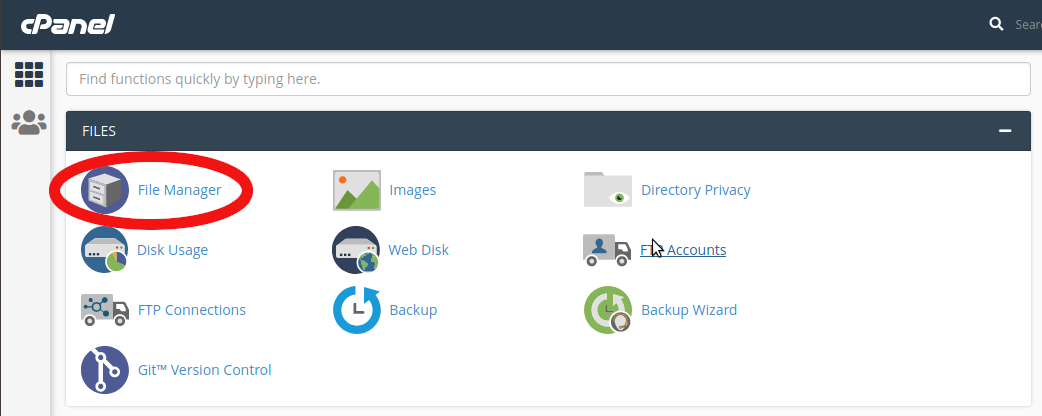
2. Under FILES, click File Manager.
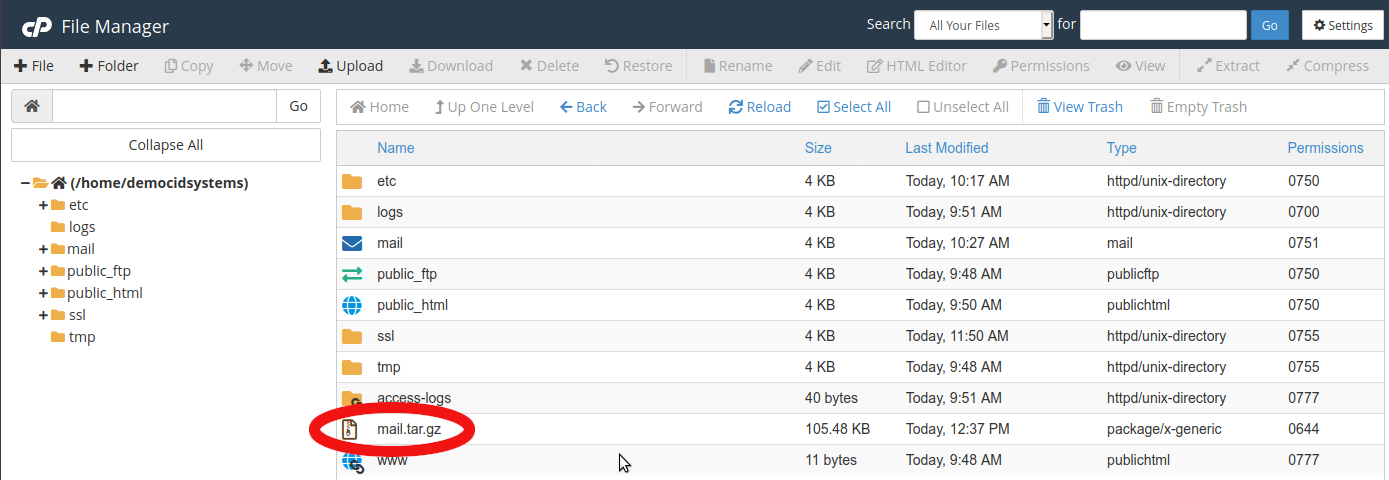
3. Click the Mail icon then click Compress.

4. A compress menu will appear. Click any type of compression agent you want to use then click Compress File(s) button. In this guide I used GZipped Tar Archive.

5. After clicking the Compress File(s) button it will create a .tar.gz file.
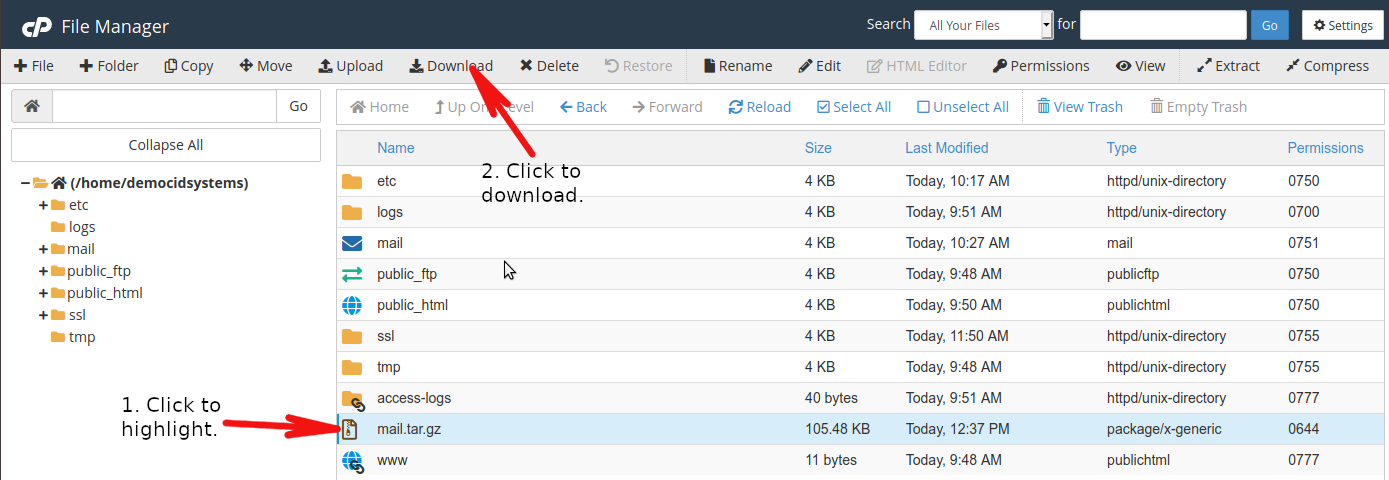
6. Click the .tar.gz icon and click Download.
7. Click Ok/Save button to start downloading and saving the .tar.gz file to your computer.

NOTE: Go to the folder where the .tar.gz file is saved and scan it using your Antivirus software.
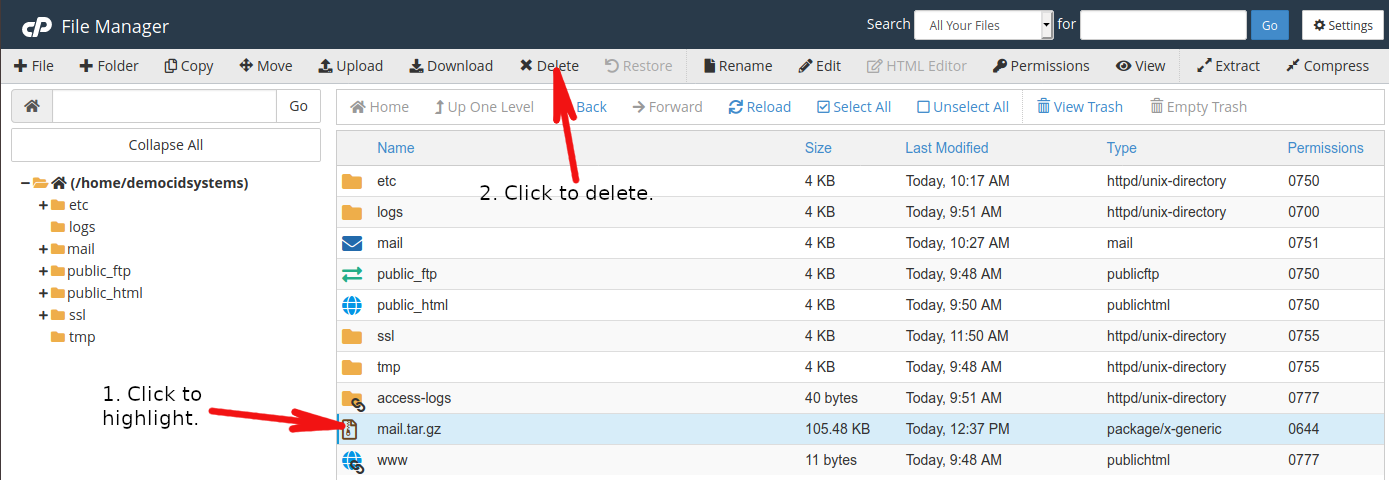
8. After downloading, highlight the .tar.gz file again and click Delete.
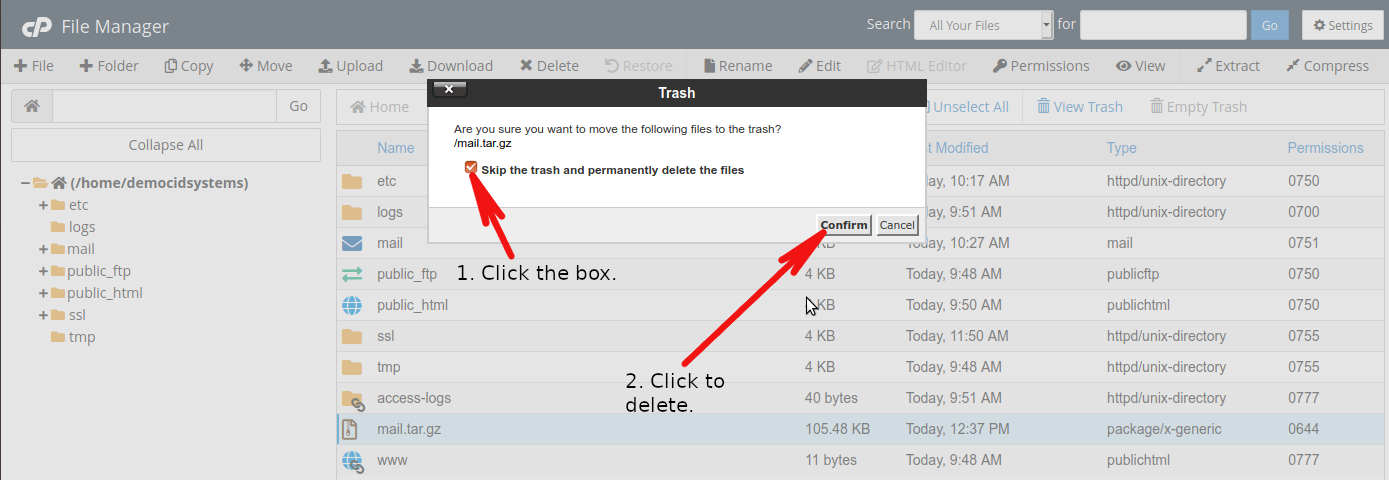
9. A trash confirmation will appear. Click “Skip the trash and permanently delete the files” box then click the confirm button.
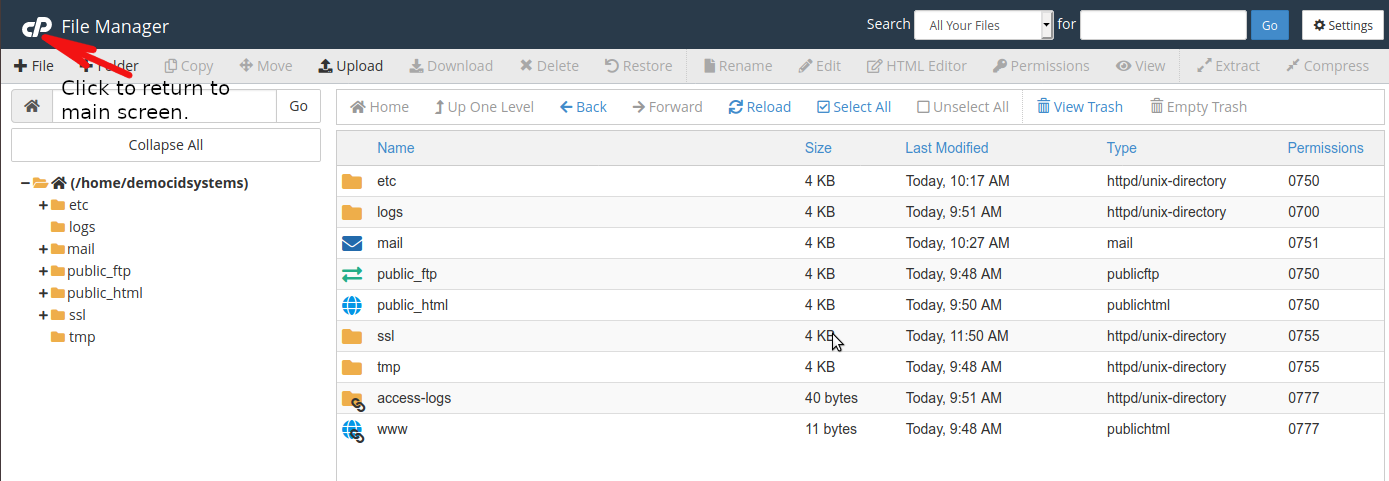
10. After deleting the file, click the cPanel icon to return to cPanel main screen.
Rebuild and Restore Procedure
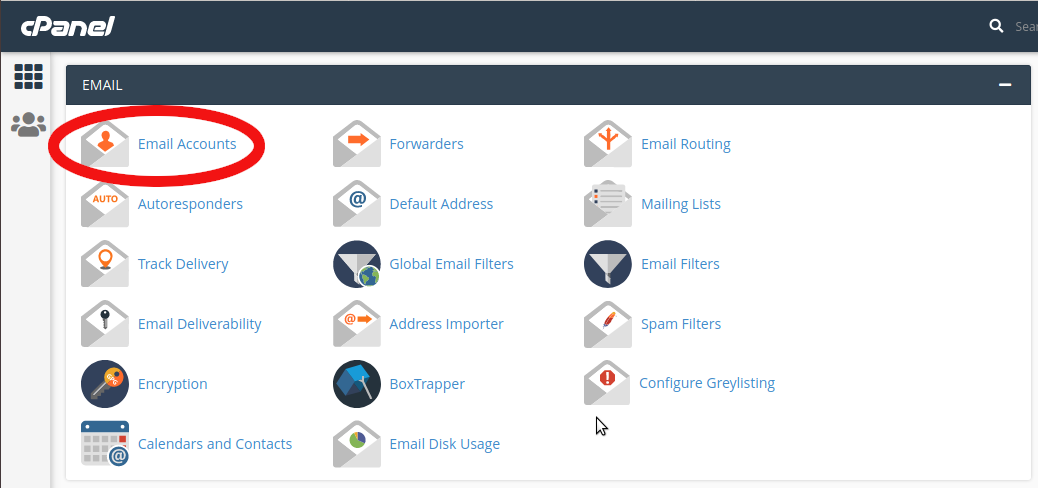
1. Under EMAIL, click Email Accounts.
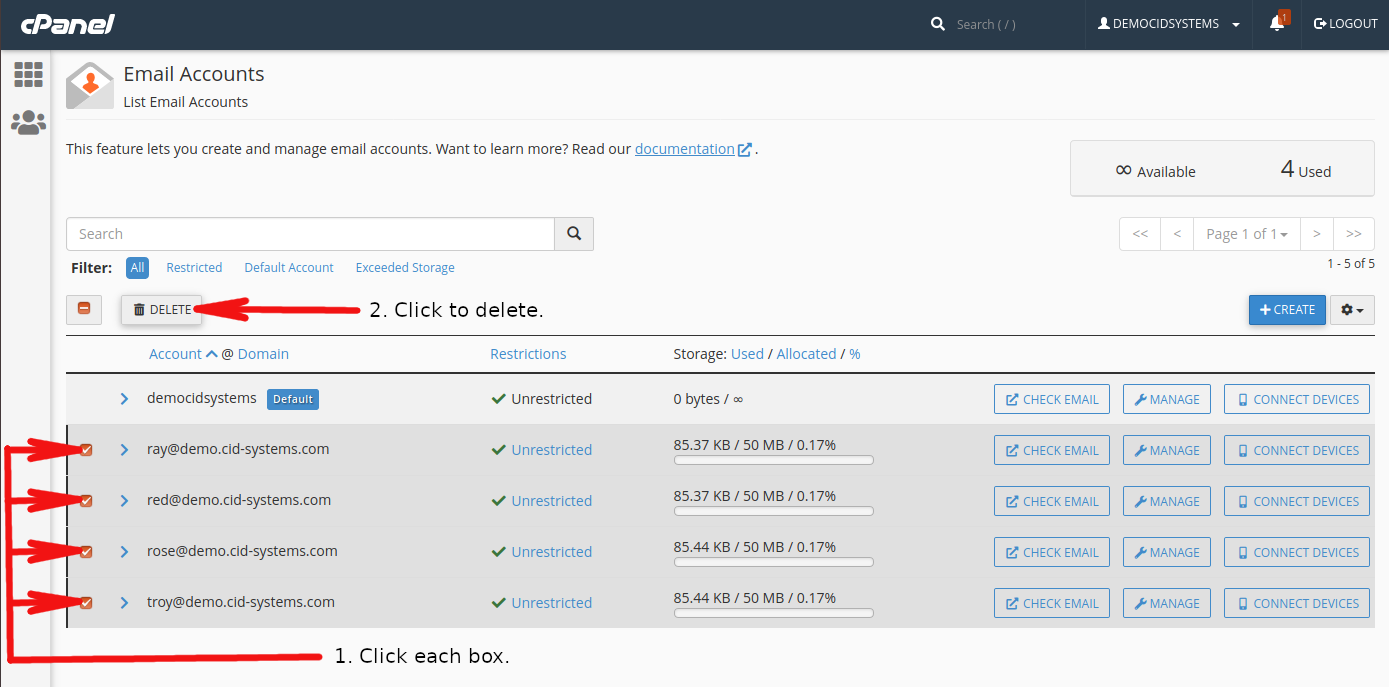
2. Check the box of each email accounts except the default email account and click Delete.
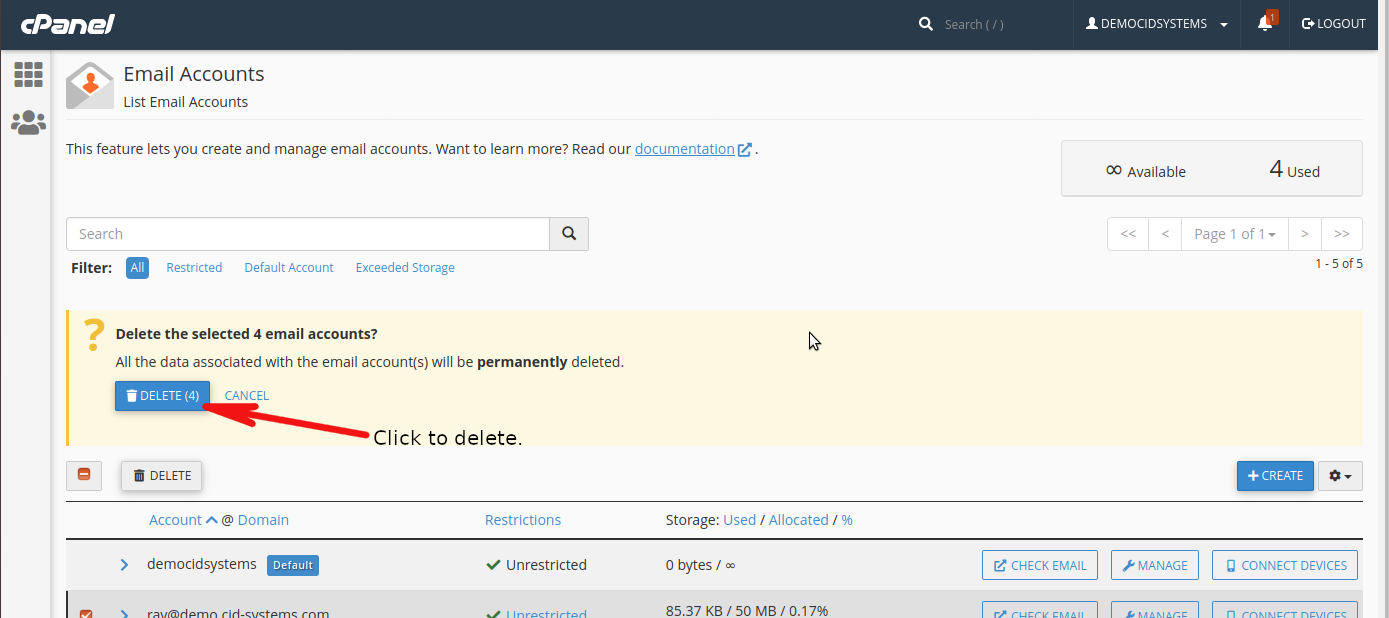
3. A deletion confirmation will appear. Click Delete to permanently delete all selected email accounts.
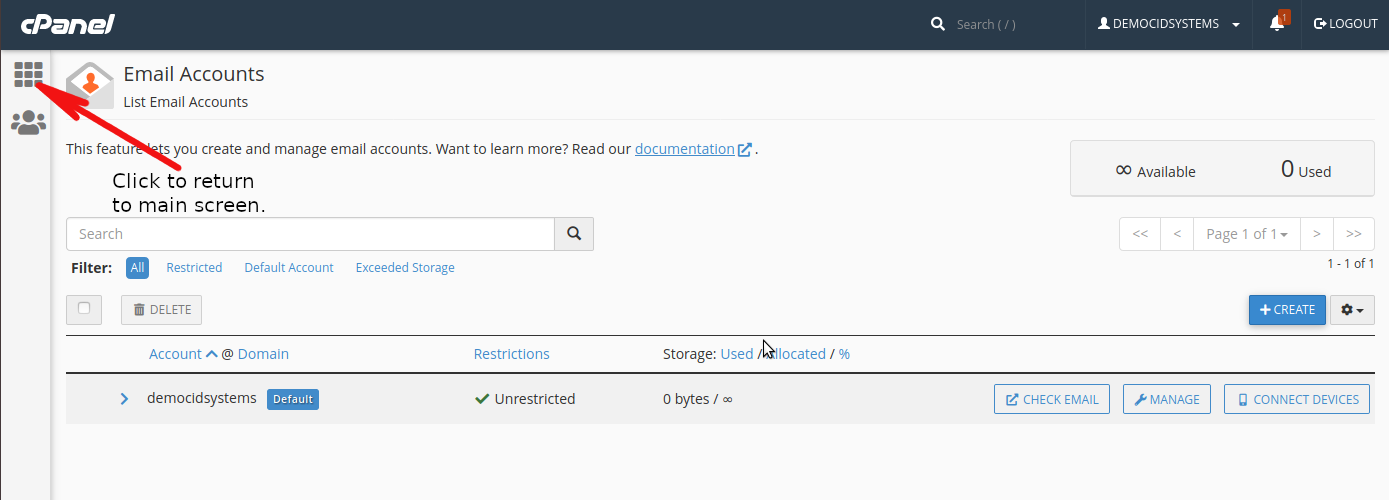
4. After deleting all accounts, go back to the main screen of your cPanel.
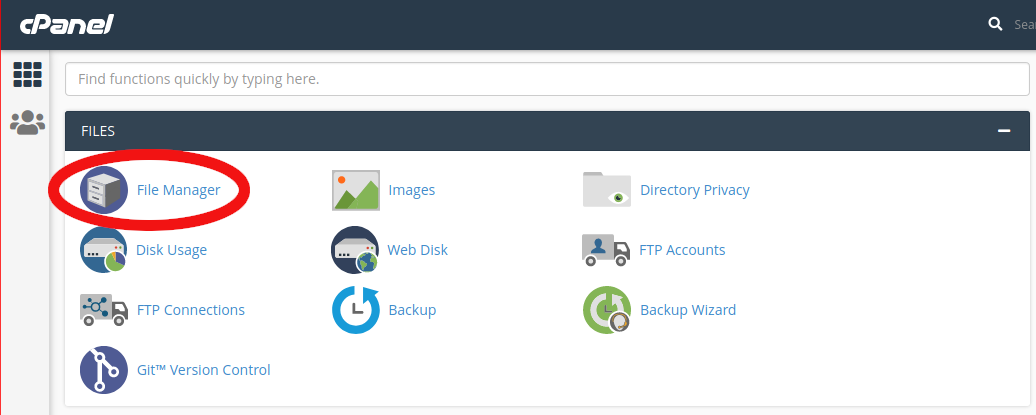
5. Under FILES, click File Manager.
6. Click Email Icon then click Delete. This will delete the mail folder and all its hidden contents.

7. A delete confirmation will appear, click “Skip the trash and permanently delete files” box then click confirm.

8. After deleting the mail folder, click the cPanel icon to return to cPanel main screen.

9. Under EMAIL, click Email Accounts and recreate all the email accounts that you’ve deleted.
Figure 1.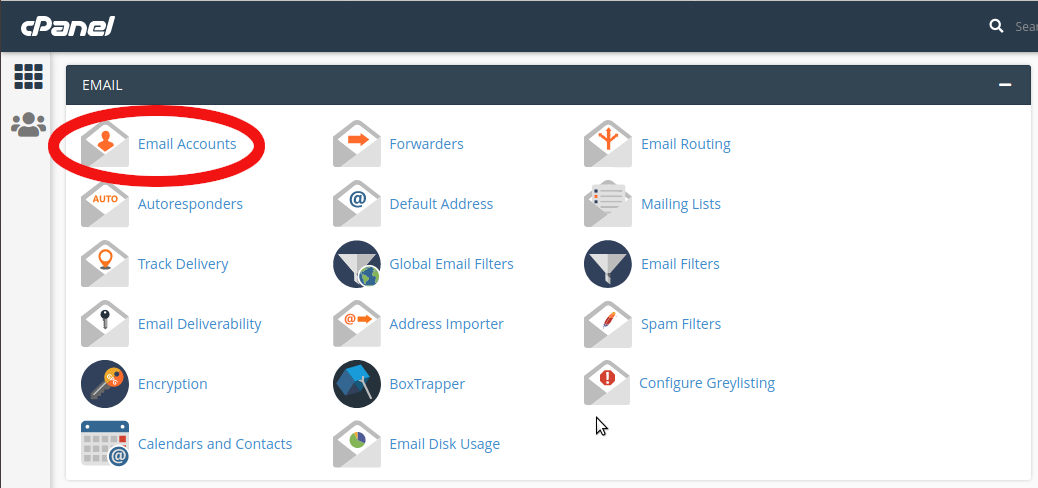
Figure 2.
NOTE: Please follow this link -> How to Create an Email Account in cPanel in recreating emails. All email addresses should have the same address name as before like what is shown in Figure 3.
Figure 3.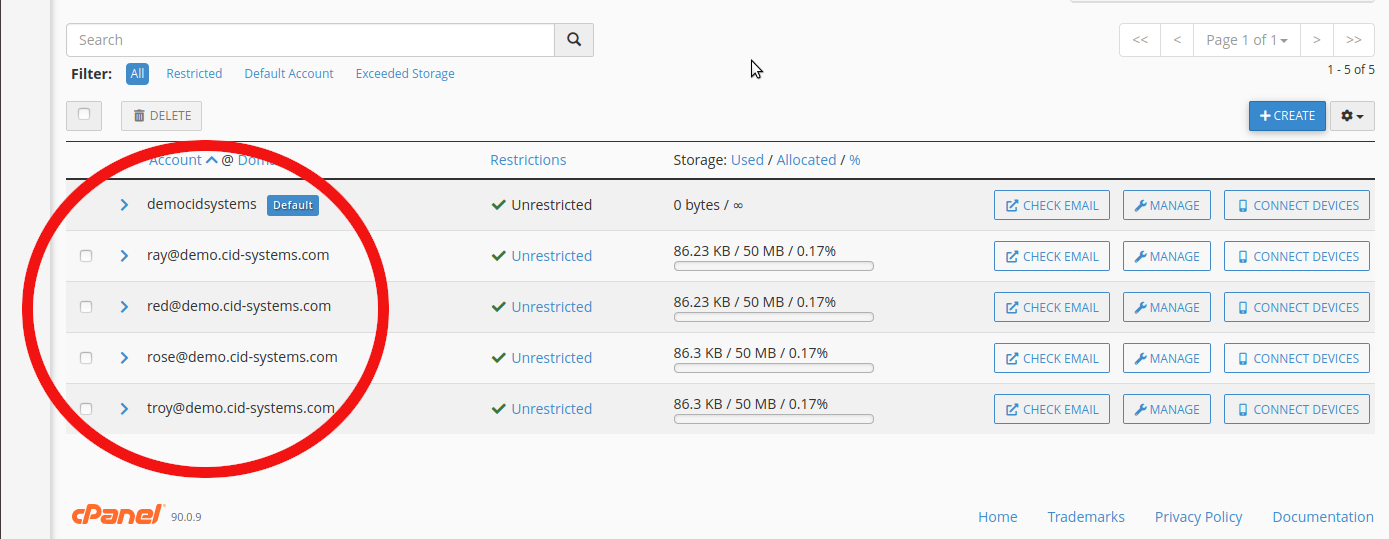
10. After recreating all the email accounts, go back to cPanel main screen and click File Manager.
Figure 1.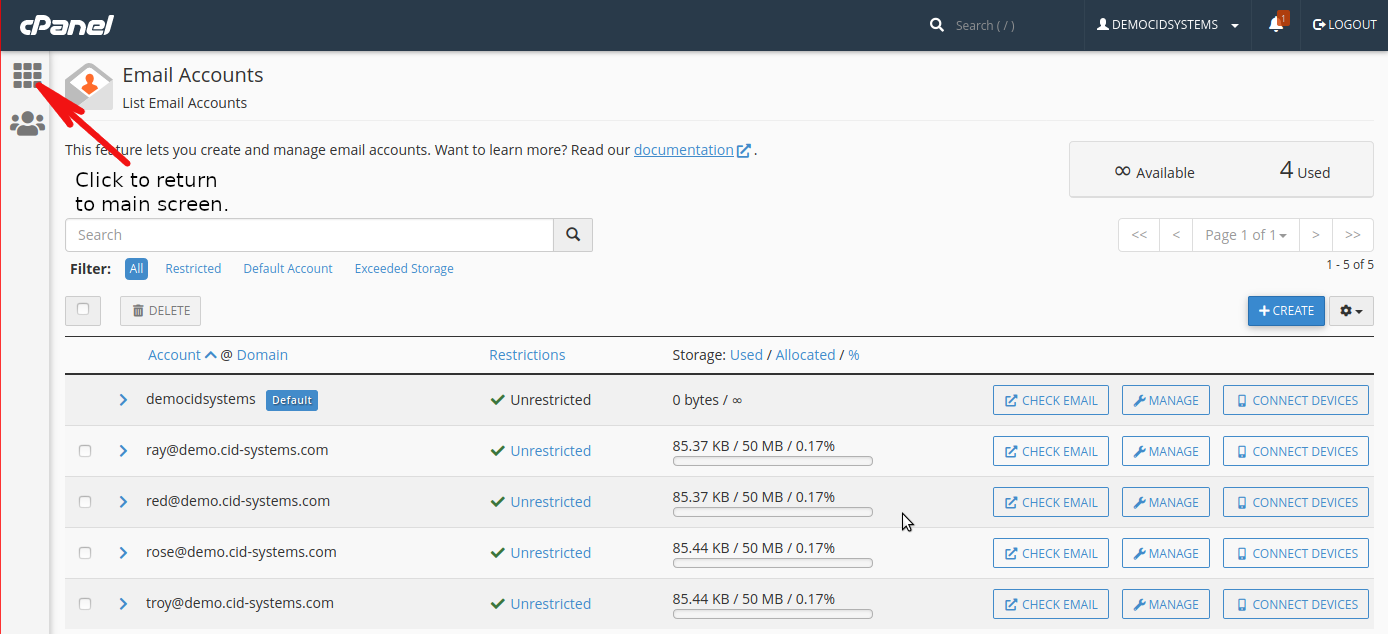
Figure 2.
11. You will see that there is a new Mail folder created. Now you can upload your scanned email backup file (.tar.gz file) by clicking Upload. If it is not yet scanned with your antivirus please do so before uploading the file.
Figure 1.
Figure 2.
12. A new tab will appear. Click the Select File button.
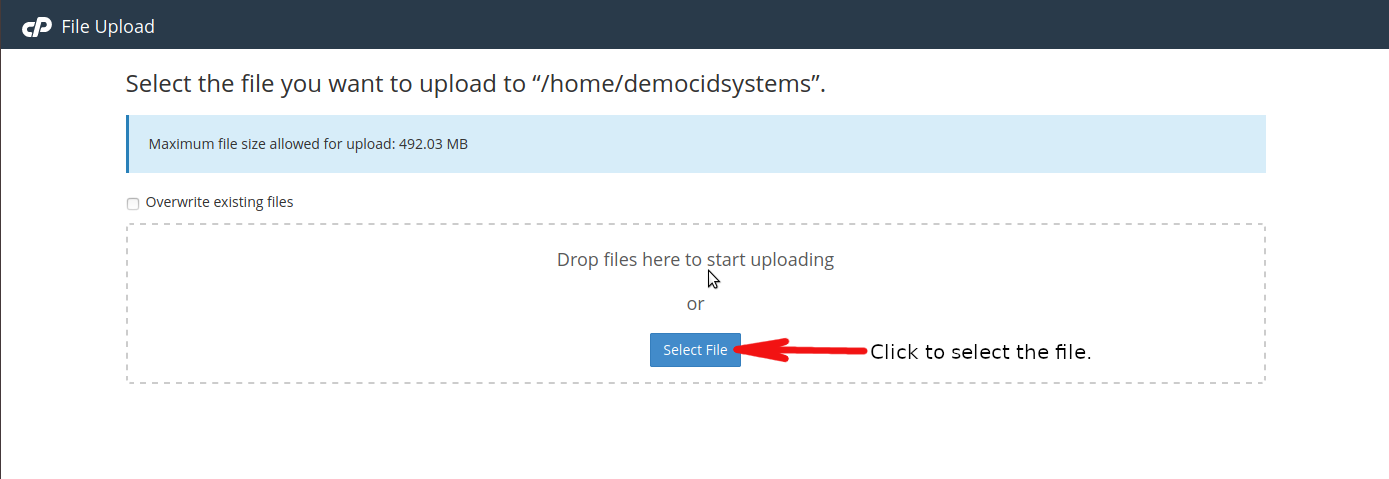
13. Go to the folder where you download and saved the backup mail file (.tar.gz file) and double click it to upload.
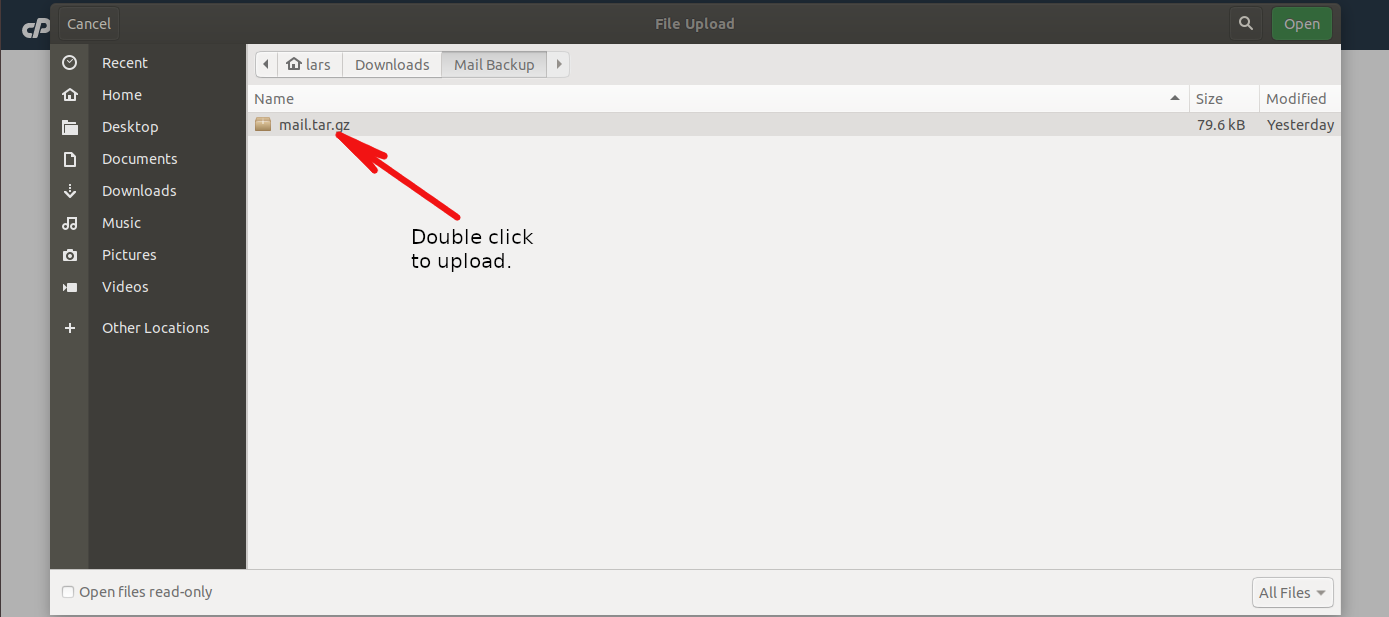
14. After the email backup file has been uploaded, click Go Back to “/home/yourfoldername”.
Figure 1.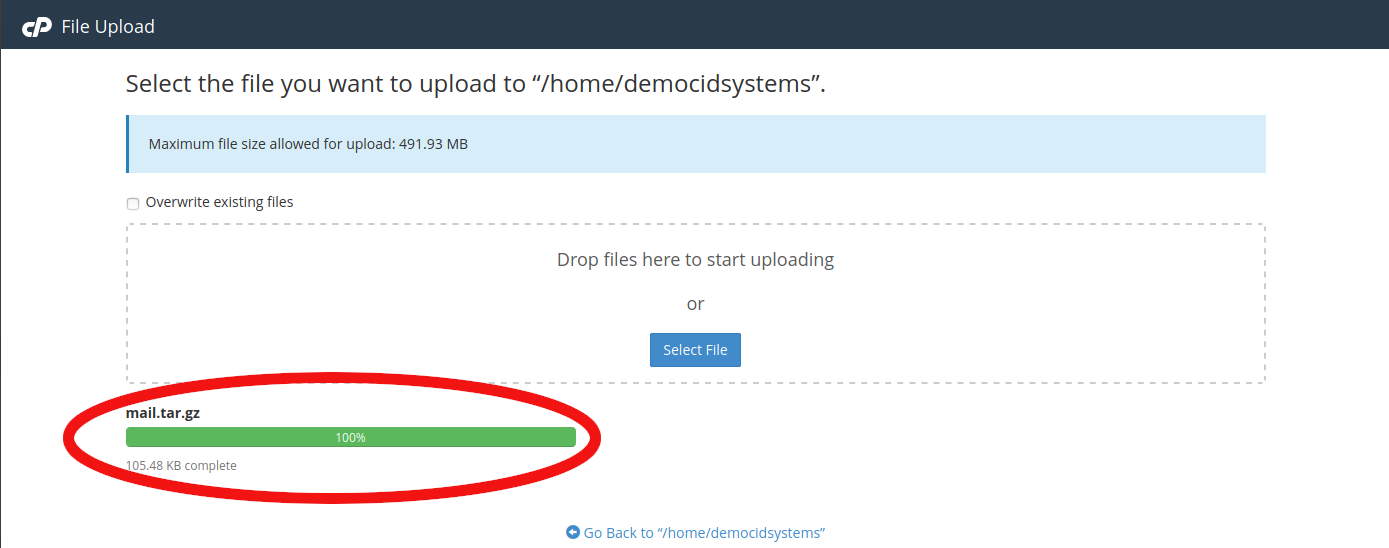
Figure 2.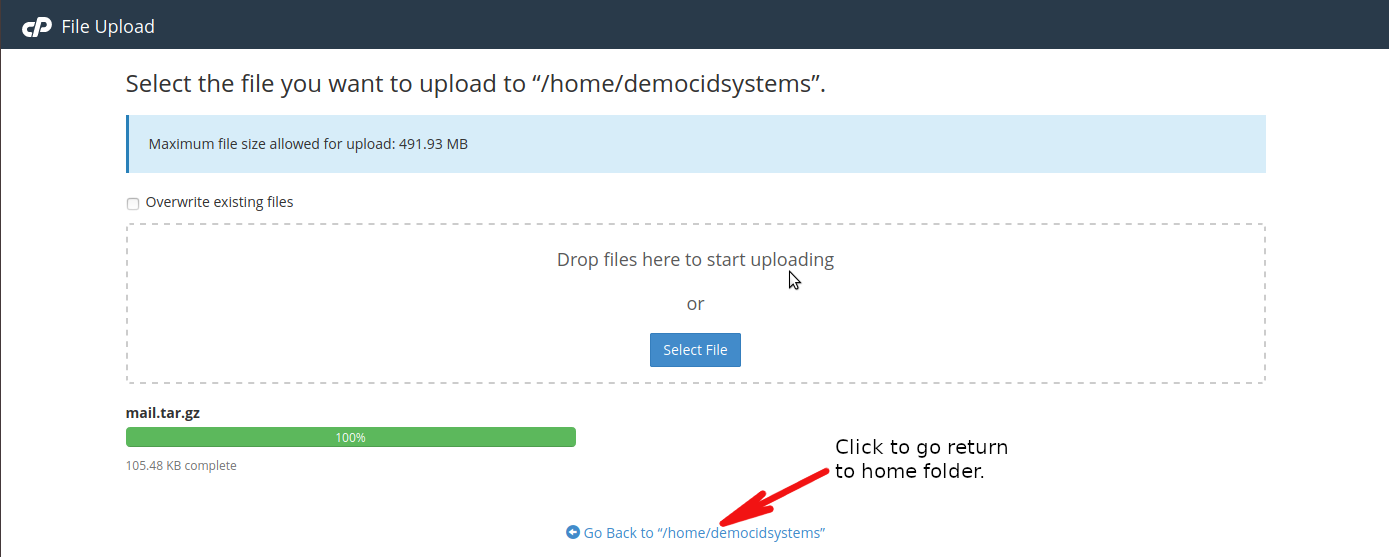
15. You will see that the mail backup file has been uploaded, highlight the file by clicking the icon then click Extract.
Figure 1.
Figure 2.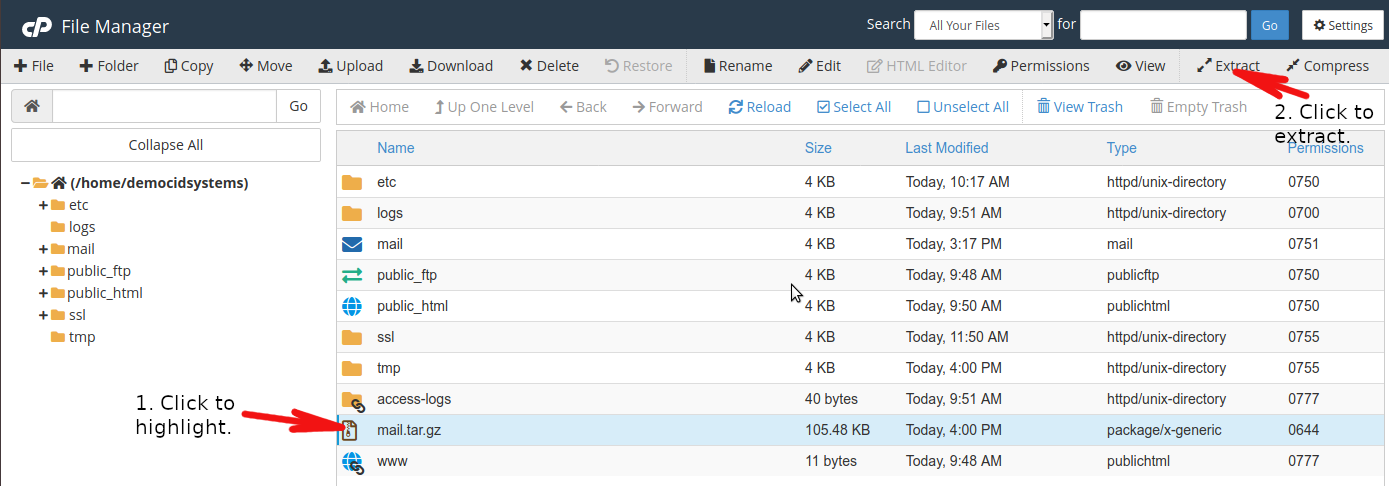
16. An extract confirmation will appear. Do not type anything just click Extract File(s) to extract the file to the default mail folder.
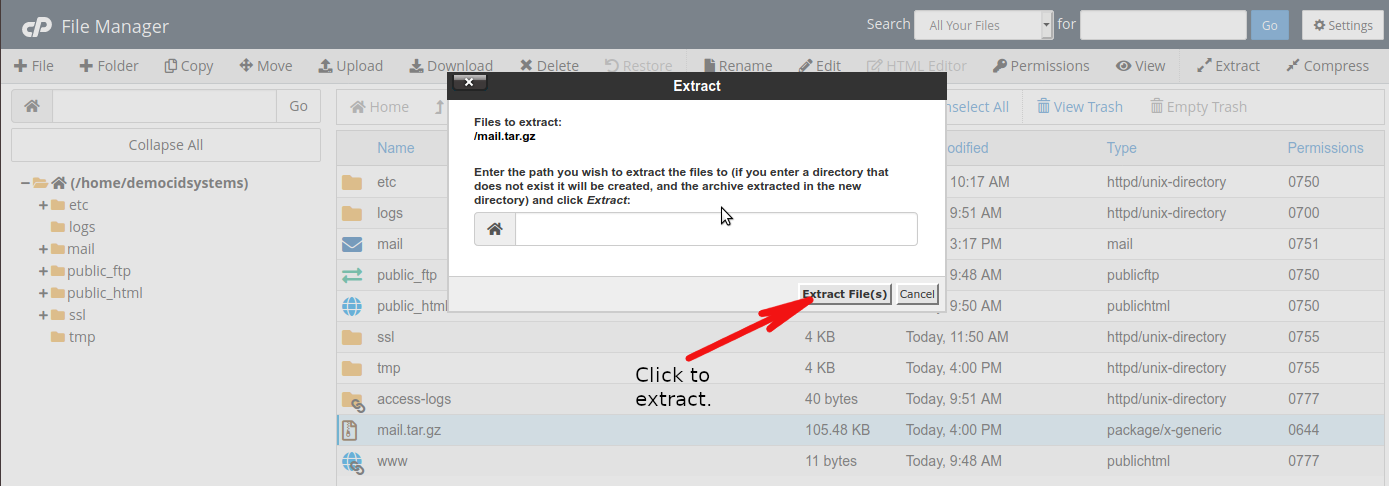
17. After clicking the Extract File(s) button, an extraction result will appear. Just click Close button.
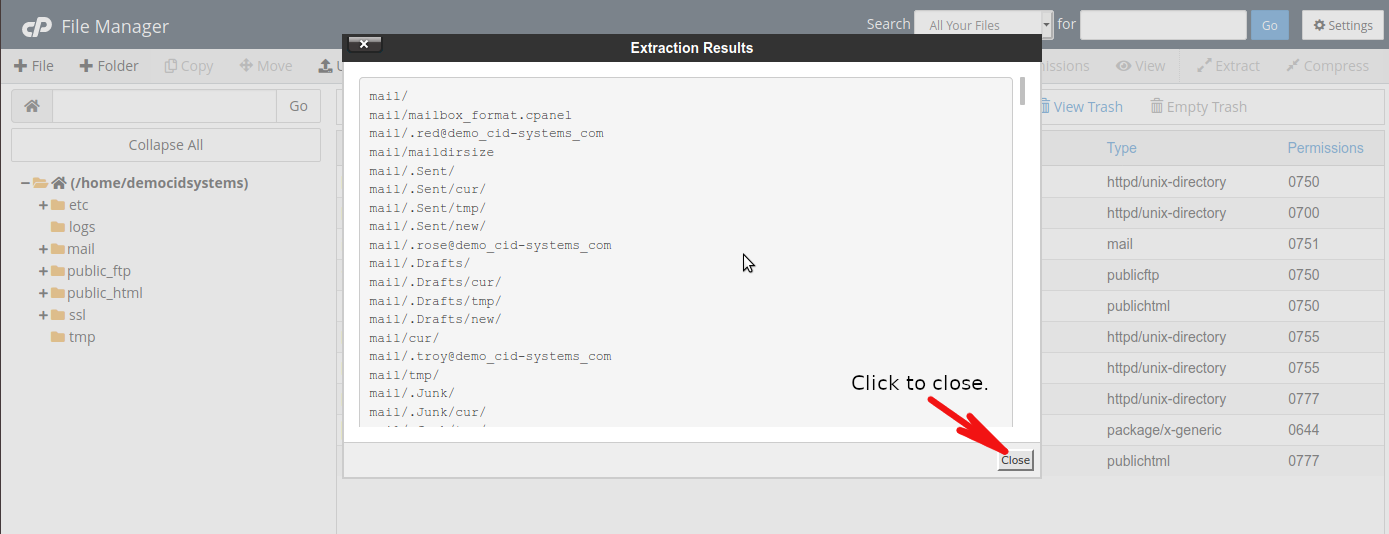
NOTE: After clicking the close button, you may now delete the .tar.gz file. Follow steps number 8, 9, and 10 of Backup Procedure.

