Setup Thunderbird to automatically delete emails from the server after (xx Days) for Windows, Mac, and Linux

1. Open your Thunderbird mail client.

2. Right click the account that you are going to configure.

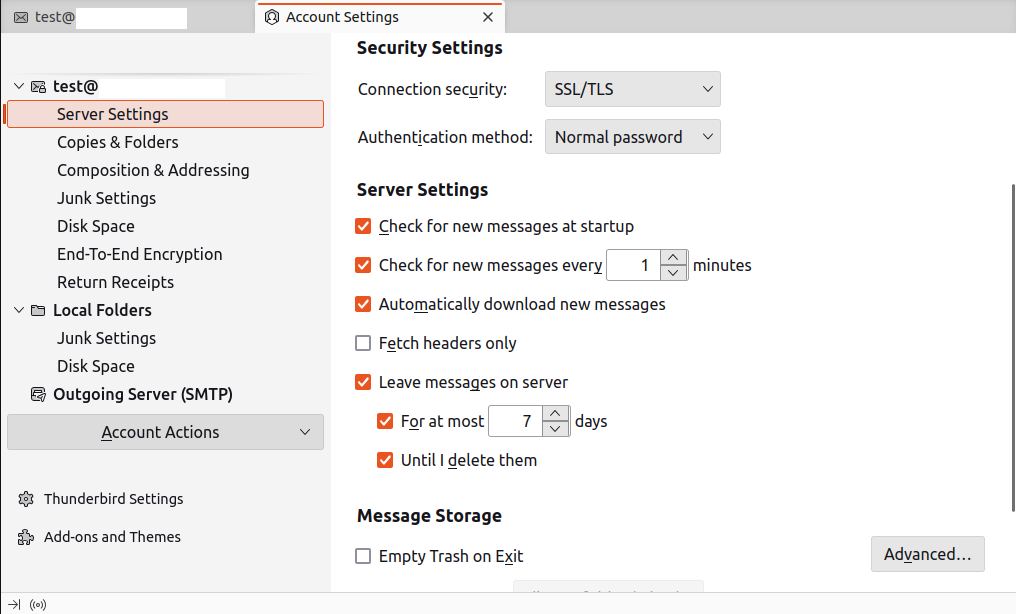
3. Click Server Settings and add check marks on the following and change the number of days you want the emails to stay on the server before being deleted automatically.

  • Leave messages on the server.
  • For at most xx days (change xx to desired number of days you want your emails to remain on the server before being deleted).
  • Until I delete them (if you want to delete emails manually). See Figure 1

Figure 1.

Note: This setup only works on POP settings and deleted emails are non-retrievable. Please exercise with caution.

  • Automatic, Delete, Emails, POP
  • 0 Users Found This Useful
Was this answer helpful?

Related Articles

How to Download and Install Thunderbird

1. Click the link below to download the latest Thunderbird installer. Thunderbird Installer 2....

Configuring your email account on Thunderbird for WIndows

1. Open the Thunderbird client by double clicking the icon in your desktop and make sure the menu...

POP3 Email Setup on Android

Step 1  To get started on setting up POP3 email on your Android phone. Click Settings in your...

POP3 Email Setup on IOS

Step 1 Open Settings on your iPhone and tap Accounts & Passwords. Step 2 Tap Add...

How to Change Password in Webmail

This Article will guide you on How to Change Password. Access your webmail on any browser,...